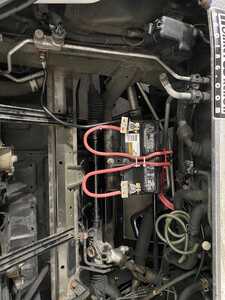
Ground loops can be a PITA. It's basically if you ground the battery to chassis, but then also ground a sensor/relay/stereo/whatever and then that sensor/relay/whatever is also grounded to the chassis. It'll create a voltage differential which in the case of a sensor, offsets the reading by the voltage differential. Most aftermarket stand alones have a ground wire directly from the battery, then the sensors ground through the ECU.
Ground loops can be a PITA. It's basically if you ground the battery to chassis, but then also ground a sensor/relay/stereo/whatever and then that sensor/relay/whatever is also grounded to the chassis. It'll create a voltage differential which in the case of a sensor, offsets the reading by the voltage differential. Most aftermarket stand alones have a ground wire directly from the battery, then the sensors ground through the ECU.
The chassis is not a good ground for a lot of sensitive electronics. For car audio the problem is the voltage potentials from the RCAs that crates ground loops from the receiver and the amps where it picks up noise. The solution is to ether share a common grounding point or run separate small grounding wire bridging the two and it works in just about every install I have done. The sad thing is they sell all kinds of devices or special cables to suppress the noise when the solution is simple.
What is also funny were those grounding kits that give you more power when what they actually do is fix your corroded chassis grounds and restore power. Then it became a thing for being a dress up kit for the engine bay.
You really should strive for a single point ground system.
The battery acts as a very good noise filter for the alternator when the engine is running, so a solid battery (-) terminal connection to the engine block is most important.
Then a solid independent connection from the battery (-) terminal to the body/chassis - the power distribution system for the car has multiple ground connections that are very important to limit noise.
Since any noise signal consists of many high frequency harmonics, braided ground strap is also preferred to solid or minimal stranded wire.
Grounds also return current back to the battery so the wire strap must also be sized to handle the required amperage as well.
Poor grounds induce noise into undesired circuits and create varying voltage potentials at differing nodes which can/will create issues with both analog and digital circuits.
Just some things to think about when taking wiring shortcuts.
Mono Craft GT-300 with a few upgrades...
New parts coming in soon.
C-One style side vents and front/rear Whiteline Sway bars.
www.patricklipp.com
www.mytechliving.com
Looking really good.
And I will be third (I think) to vouch for PLX gauges. Very happy with my DM-6. Only thing I would change is add adaptive brightness. In the country (real dark) at night it can be distracting. Good thing mine is inside the cubby... Just gotta close the lid 🙂
Haven't just been sitting idly by, but have been away from the forum for a while. I've been needing to get a few parts to bring the car back to a point where i'm comfortable.. more of the maintenance thing than anything else to get the car running as it should. Anyways, a few weeks ago I finally purchased the Idle Air Control Valve which should hopefully fix the idle issue, and I also got a new timing chain tensioner to fix that oil leak. I forsee a new valve cover gasket at some point as well, othewise, the car runs well, sounds good and is getting closer to where i'll be comfortable finally installing the turbo... Another year down of it all getting done... I suppose it's a slow process, but it's getting done the right way.
www.patricklipp.com
www.mytechliving.com
I guess i
havent given any updates on my build in a while. I’ll give bullet points.
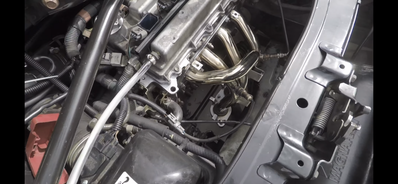
installed turbo kit.
drove car and began tuning.
couldn’t get afr’s right.
decided it was time for a lotus so put the car up for sale.
multiple offers later where they wanted to k-swap I changed my mind and deciddd to keep the car.
pulled turbo off.
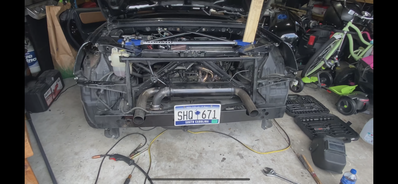
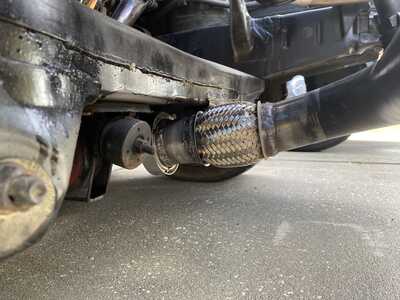
discovered I had an exhaust leak in the flex pipe which is what caused the afr problems.
put car completly back to NA.
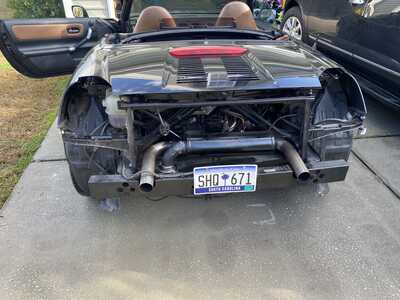
stripped car of soft top and soft top frame.
and that’s where we’re at now.
Now for the new. I’ve found my welding abilities and fabricating skills are actually pretty good, so I have actually taken the soft top frame and am making it into a removable “bra” style top. I’ll be welding the frame solid this weekend.
mom going to be doing a proper roll bar in the next few weeks.
im going to build my self full under bracing.
and the list goes on.
www.patricklipp.com
www.mytechliving.com
Nice! I've considered this while doing my engine project. I have some questions...
1. how are you mounting the battery in the frunk area?
2. where did you route the cables going back to the engine bay?
3. how much wire (lengths) did you need and what gauge?
Get your Short Antennas, Decals, and all sorts of goodies at:
https://takubanmotorsports.com
so I used the stock battery tray and welded it to the frunk bin support. I had to drill out two of the spot welds and pull off the vertical support and then bend a small piece of metal, but then it sat in a way that fit well. I’ll grab a photo of it.
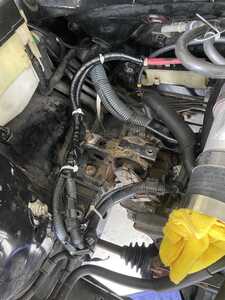
The cables are routed along with the rest of the cables, water lines, clutch line, etc, including up and over the gas tank.
The recommended is 6awg, but I went with 4awg to have a bit of headroom. 12 feet should be more than enough with some extra. I had leftover wires from a previous project that were around 10 feet in total and I had some to spare.
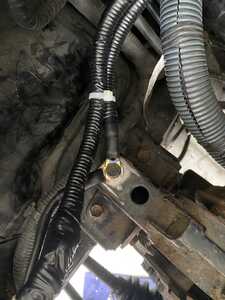
things to note. In the rear the ground points are literally just the. Chassis and the transmission, so that part is super easy and technically you don’t even need a ground point back there if you just attach the oem battery termination to the chassis on some way(cutting it and re-terminating it or something), and just having a chassis ground in the front. I opted to have a ground in the front and the back, including a beefy one onto the engine while also maintaining the trans.. I think I have a minimum of three grounds on the engine and trans now.
as for positive, I routed the wire to the back and spliced the oem positive into the new cable, soldered them and then heat wrapped and the electrical tape.
www.patricklipp.com
www.mytechliving.com
Just got around to installing the whiteline sways finally.. unfortunately ran into an issue with the front while torquing down the bolts.. sheered off the top of one, so had to pick up a set of those special screw removal bits. Worked great and I was able to get the old bolt out.. install of front is complete, and tomorrow new endlinks for the rear should be making their way to my house so I can finish the rear.
www.patricklipp.com
www.mytechliving.com
so I used the stock battery tray and welded it to the frunk bin support. I had to drill out two of the spot welds and pull off the vertical support and then bend a small piece of metal, but then it sat in a way that fit well. I’ll grab a photo of it.
The cables are routed along with the rest of the cables, water lines, clutch line, etc, including up and over the gas tank.
The recommended is 6awg, but I went with 4awg to have a bit of headroom. 12 feet should be more than enough with some extra. I had leftover wires from a previous project that were around 10 feet in total and I had some to spare.
things to note. In the rear the ground points are literally just the. Chassis and the transmission, so that part is super easy and technically you don’t even need a ground point back there if you just attach the oem battery termination to the chassis on some way(cutting it and re-terminating it or something), and just having a chassis ground in the front. I opted to have a ground in the front and the back, including a beefy one onto the engine while also maintaining the trans.. I think I have a minimum of three grounds on the engine and trans now.
as for positive, I routed the wire to the back and spliced the oem positive into the new cable, soldered them and then heat wrapped and the electrical tape.
Ahh. OK. I have some stuff up in the frunk area now, but that location you mentioned is still open in my case. I would use 4AWG too since I have a bunch of it already. I'm currently already running a2w hoses through that tunnel area, but there would be room for cables as well. I would probalby attach them to the factory cables maybe by using a screw terminal that bonds them both and is covered. But that is something for future Justin to worry about.
Thanks for the info on what you did. I haven't ruled it out completely for this "current" (See what I did there? hahaha) project, but I am trying to eliminate scope-creep wherever I can. Although, that area would make a good spot for the catch cans I need to mount somewhere.
Get your Short Antennas, Decals, and all sorts of goodies at:
https://takubanmotorsports.com
not a lot of updates, but some. ADHD forever making me change what my car is... for now, this is how my car sits.
As you see, front lip and side skirts installed along with c-one side "Scoops". witeline swaybars installed front and back.
I sold turbo kit a while back.
The to-do list is as followed
- replace rear passenger side BC BR strut as it's blown.
- replace front passenger side tire as it's corded
- get an alignment
my current mind space for this car is to turn it into a slow, but fun, uncompetitive time attack car. building it into a track car was my goal back in the 2012-2014 time frame, but I now have the means and more time to do so.. so why not. I'm not going for an all out build and just want to enjoy the car on the track. ya-know, fill the void of going fast without killing myself on the street and pushing a slow car as fast as I can..
In no particular order, the new list for performance parts is as followed..
- Rear splitter/under tray - Sourced pricing of sheet aluminum from a local supplier. $114 for a 4'x8' sheet of 20ga aluminum sheet...
- Front splitter - need to source PLA or some other composite to use for this.
- frame mount pylons for big wang
- seat
- cage
- wheels. probably going to go with 15x5/15x9, but that's tbd..
That's it for now. lol the track is still a ways off, so i'm just working through everything slowly.
www.patricklipp.com
www.mytechliving.com

