Snow is owned by Nitrous Express now, so buyers, take that as you will.
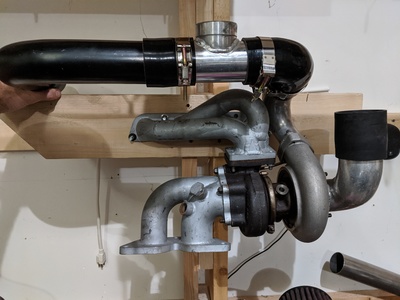
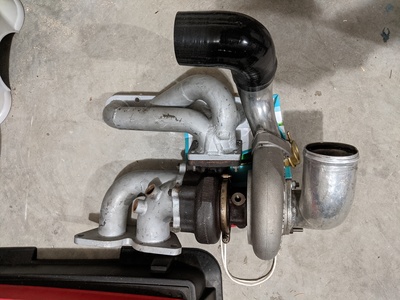
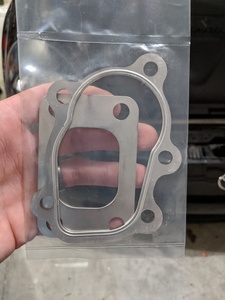
Great info that I will take into consideration. Progress has been slowed, as expected because of Covid, but there has been progress on the outlined Stage 1 of the build.. Firstly, laying out/putting together the kit off the car, making sure the parts are all there and checking fitment. Once looking at the gaskets, I realized I needed new all around, so they were purchased.
www.patricklipp.com
www.mytechliving.com
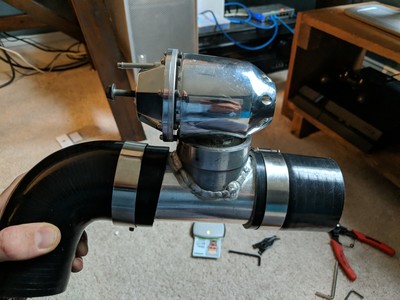
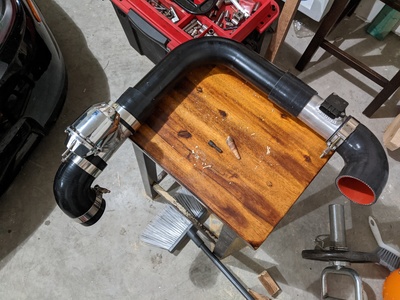
Gaskets came in, I had to buy a C-clip and o-ring for the HKS BOV. Also trying to figure out the best piping route... preferably to not cut anything, but it's not looking likely.
Any thought on placement of MAF and BOV? my thoughts were to have the MAF as close to the manifold as possible as to record as close to true intake temps and airflow(cfm) going into the engine. any theory on the BOV placement?
www.patricklipp.com
www.mytechliving.com
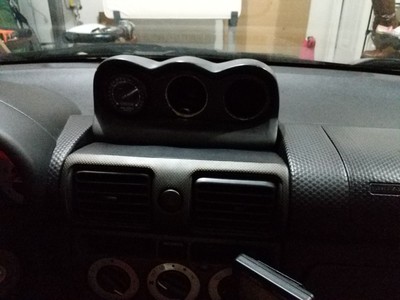
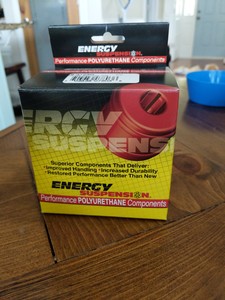
Got the gauge cluster back in. Man I forgot how much these early versions of the LP gauge pods move around without velcro or some sort of adhesive. a quick drive with it in place and I removed it until it's wired up and some sort of adhesive is installed. I also got some new solid bushings for the front control arms.
www.patricklipp.com
www.mytechliving.com
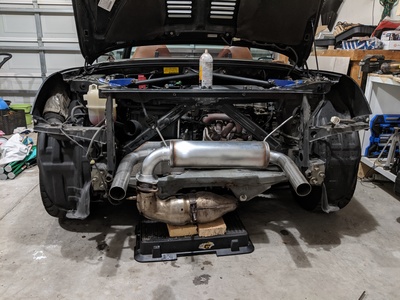
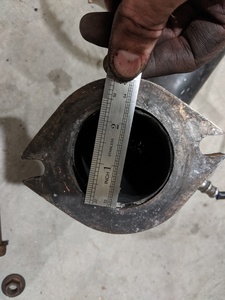
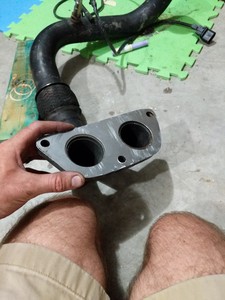
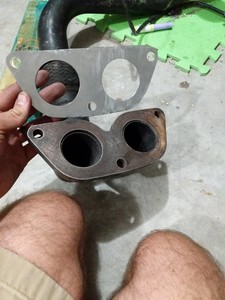
Last set of the day; After a quick drive to get some new gas, I started pulling things apart. This brings my first issue to light. One of the things DEV has outlined with the CHE muffler to down pipe situation... The donut gasket of the muffler and the Che downpipe don't match.. I am thankful I went with full 2.5" for my exhaust though. I planned it all out years ago. It also saddens me to know I've had this exhaust for so many years. :'( The muffler I got from TwoStep(Gambel) more than 4 years ago off of Spyderchat... The Che midpipe I purchased in 2011 from Che directly... I've also had my rcntype splitter since April 2013 


Diffuser/Splitter hardware.
Hardware order top down:
Bracket > diffuser front panel > Big washer > lock washer > nut
Subframe > Spacer > diffuser middle > Big washer > lock washer > Long bolt
Nut > small washer > bumper > neoprene washer > diffuser rear channel > small washer > short bolt
www.patricklipp.com
www.mytechliving.com
Nice kit! Good to see the divorced wastegate setup. With all that's happening you should now have lots of time to mess with this
Disclaimer: I have zero firsthand experience with boost, so the below recommendations are just what I have learned through reading and plan to implement in my own build.
Regarding placements along the charge line: You do want the MAF pretty close to the throttle plate, most do recommend at least 6 inches away from it to reduce shock from the throttle plate snapping shut. BOV should be upstream of the MAF, so the MAF doesn't measure air that ends up expelled from the charge pipe. Not sure if there is any difference to pre or post-intercooler, maybe someone else can chime in here. Either way, I would suggest leaving the max allowable space between BOV and MAF in case you do end up adding meth injection. I plan for my meth injection to be post-BOV and pre-MAF, with at least 6" between all elements. You don't want to be blowing methanol out the BOV if you can avoid it, and you do want the meth to have fully vaporized before reaching the MAF so you can get accurate air temps. Many inject post-MAF, but personally I want the ECU to see the temp of the final air charge, in case the meth system malfunctions.
@marsrock7 I really recommend you reconsider where you inject methanol! Not only will you avoid compressor damage, but you will get much more benefit by injecting in the intake manifold. Best arrangement is one water injector aimed between cylinders 1 and 2 and another aimed at between 3 and 4.
@marsrock7 I really recommend you reconsider where you inject methanol! Not only will you avoid compressor damage, but you will get much more benefit by injecting in the intake manifold. Best arrangement is one water injector aimed between cylinders 1 and 2 and another aimed at between 3 and 4.
I wouldn't even think of doing it pre-compressor. My plan is to have it either pre-MAF, or post, which is only a few inch difference since it's just before the throttle body. I like the thought of having it pre MAF so that I can better track intake temps, although it's not a huge issue since I could just put a temp sensor in there.. that's a problem for another day though.
www.patricklipp.com
www.mytechliving.com
Had a response typed up, but lost in when editing my previous post. I have done some more work.. errr pulled some more parts off. One thing led to another and I pulled the intake manifold off. Good thing I did too because the gasket was SHOT. It was as flat as can be and would have been boost leak city. New gasket got here a few days ago, so some time this week that'll be going on. I also installed the 630cc injectors, although they'll be coming back off along with the fuel rail when I put the intake manifold back on with the new gaskets. I also ordered a special donut gasket for the exhaust which should fix my issues there, but we'll see.. Once I finally get all of the parts in the next week or two, I should have it back together to drive and get the base tune on with the 2.5" intake and 630cc injectors.
www.patricklipp.com
www.mytechliving.com
@pattielipp I would think that a water droplet on the surface of the sensor would really screw up the MAF signal, at least temporarily. The MAF signal is highly dependent on the heat transfer from the sensor to the air flowing over it.
@marsrock7 I really recommend you reconsider where you inject methanol! Not only will you avoid compressor damage, but you will get much more benefit by injecting in the intake manifold. Best arrangement is one water injector aimed between cylinders 1 and 2 and another aimed at between 3 and 4.
I would not attempt injecting pre-comoression with a turbo, too little to gain for the risk, when it could just as easily be done post-compression. I'm comfortable doing it to a roots type blower, which has been done for ages in a multitude of applications. I agree the ultimate point of injection is into the manifold, or even directly into the runners or injector base, at which point it's a secondary fuel rail. Given the nature of our cars and engine placement, I would not be comfortable installing this system on the manifold. It would make maintenance to the system, changing nozzle sizes, or whatever else, much more difficult than it needs to be. In a front engine car where I can see the manifolds, I'd be more open to the idea. In this car, keeping the meth system on the charge piping makes the whole system much easier to maintain.
@pattielipp I would think that a water droplet on the surface of the sensor would really screw up the MAF signal, at least temporarily. The MAF signal is highly dependent on the heat transfer from the sensor to the air flowing over it.
Agreed, so one should make sure they are not injecting more than the airflow can soak up, and the injection point is far enough away from the MAF to allow complete vaporization before it gets there.
My boosting knowledge is not very good however I hope to add a little of what I remember about the roots type SC for various applications for the Spyder 1ZZ and 2ZZ alike from reading past discussion concerning meth or water injection. Apparently some people noticed the coatings on the roots wearing thin or eroding.
@marsrock7 I don't think you can ever be sure that the water injection system will not put out some large droplets that will not get atomized. The first and last amounts of water that leaves the injector will always be relatively large (just like with fuel injectors). Also the air temp before the MAF will vary with the ambient temp, so you won't always have enough heat for full vaporization. The only sensible location for water injection on a boosted engine is in the intake manifold plenum.
The build goes on.
I had a short period two weeks ago where I got a pretty bad infection in my ankle and leg from a Fire Ant sting. Sucker sent me to the ER and had me on my ass for about a week with some pretty heavy antibiotics. I'm still recovering from it, bu thankfully almost back to normal.
Anyways, betting back to work, I started pulling the exhaust off the car before the infection, pulling the intake and exhaust off. In the process I discovered that the gaskets were shot. Also, while pulling the old injectors out, I used a screwdriver to pull the old stuck injector gaskets out, which about caused a heart attack when I noticed a small chunk missing from the tip of the screwdriver.... Needless to say, the next few days was basically chasing a rabbit down it's hole, or so it felt. I ended up pulling intake manifold, injectors, sparkplugs, and everything else I could off to get access to the valves and top of the piston. Putting a camera everywhere it would fit, a magnet tipped probe, and a vacuum, only to come up empty handed and wondering where the tip of the screwdriver went...
This is the point where the infection hit, but It gave me time to order the parts I needed and for them to get in while I was still on my ass. With the Intake manifold off, I realized that all of the gaskets were old, worn, dried, stretched, and wouldn't hold any boost thrown at it, so they were all replaced with OEM, and silicon gasket maker where needed.
I also installed my larger injectors 630CC, installed my short intake, and re-installed the stock exhaust for some quick testing. Cranked it over with the injectors disconnected first to hopefully not break anything to bad in the off chance the piece of screwdriver I couldn't find was still in the engine.. did a quick one-over, plugged stuff in, went to start for the first time... and it wouldn't turn over. A few minutes of troubleshooting later and I realized I hadn't plugged in the Camshaft position sensor and the water line(I don't remember what this sensor does other than warm the TB with the coolant or something) on the TB.. Plugged them in, turned it over and she started right up without hesitation. A few seconds later and the Idle went back to normal.
I should also note that I updated the basemap on my PFC. Previously with everything stock I was running the default basemap with the timing turned down about 2 degrees. With the new injectors I installed the MWR base map and then updated the Injector settings accordingly. I needed to get accustomed to FC-Edit and Co-Pilot, but everything ran fine and went about as smooth as it could. I ended up driving the car around my neighborhood for a few slow laps and then let it idle for a while. In total it was probably running for about 45 minutes, so if anything were to have broken, I think it would have happened at this point, especially if it were a piece of metal in the engine.
www.patricklipp.com
www.mytechliving.com
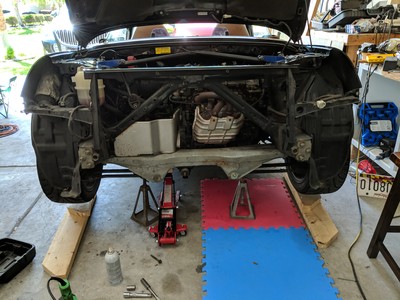
Skip ahead to yesterday and I put the back up on jack stands and pulled the exhaust completely off. Almost screwed myself over again with the Three amigos by stripping one of the bolts. Stupid electric impact wrench.. I accidentally tightened it instead of loosening it. Thankfully with a different bit, I was able to get it off.
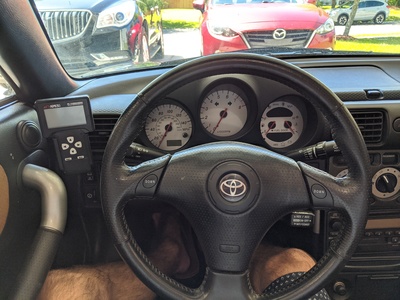
From there, I ended up running to the store and grabbing a few things for some of the electrical wiring i'll be doing. I also got some high temp/rust preventing spray paint to combat some of the small areas that aren't taking well to the weather the car saw earlier in its life. After taking care of the areas with a metal brush and spraying them down, I took to the PFC Commander, changing its placement and running it's cable to a better place. I ended up placing it to the left of the steering wheel instead of by the glovebox. Now my friends who decide to sit in the car with the legs upright won't hit their knees on it every time the sit down.. I was also able to route the cable through the door kick plate and straight up to the PFC, with plenty of slack left! a much better solution than previously having to run it through the center console.
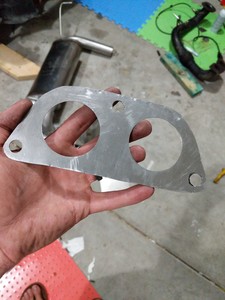
The next thing I did was take a 22ga Steel sheet and start cutting out a nice gasket shape for the new midpipe. I have struggled with what I wanted to do here. When I purchased the Che Mid-pipe years ago it came with a cardboard gasket which was garbage. Years ago I also used the OEM donut gaskets, but they ended up crushing to much and I just ended up with a nice exhaust leak, so this time I decided against it and opted to make my own. Testing will show how good it will be and how well it will seal, but this is a good first attempt in my eyes. Last night I installed it and tightened it all up. It fit pretty well and looks like it made a good seal, but if it has any sort of leak, I may pull it and make a second so that there are two sandwiched together; I'm in no rush though.
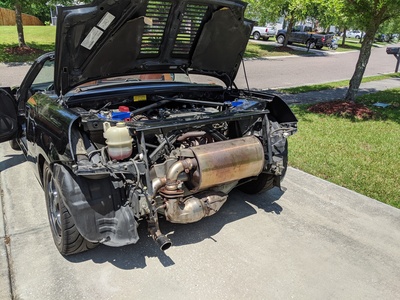
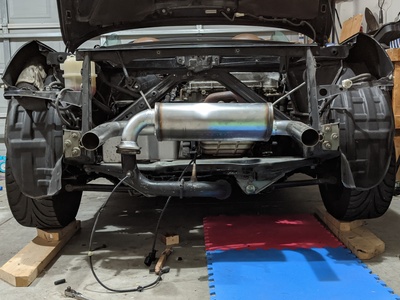
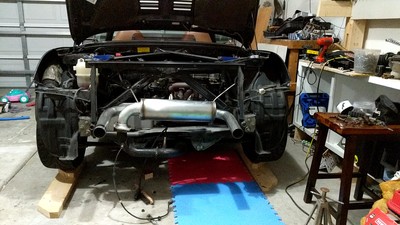
This leads me to where the car sits as of now. I put the muffler in place to test out its fitment and placement in the bumper. I had to fix the angle a bit by bending one of the hangers. Once in place I pulled it and reinstalled the bumper bar. I then rested the muffler back in place and marked on the bumper where I'll need to cut. This is where this ends for today. I have it ready to cut the bumper, bought a grinder and a 3" metal hole bit yesterday, so this should be fun.
www.patricklipp.com
www.mytechliving.com
