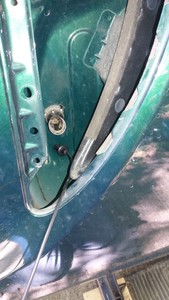
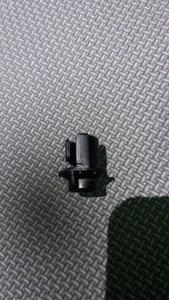
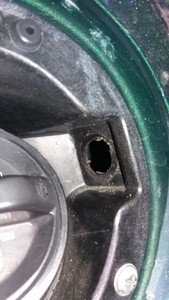
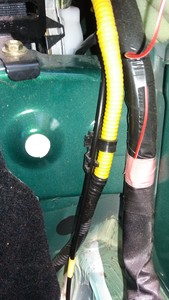
This job is a bit challenging, a bit annoying, and a bit, well, easy. I chose not to remove the rear quarter panel. I figured I would try it "the hard way", then do that if necessary. I do not think it is worth it, but if you are comfy doing it, it might be easier. I doubt it will save any time, however.
Let's jump in!
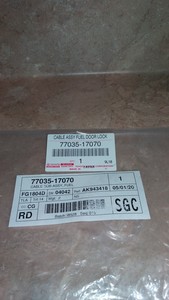
1) First, procure the parts. I got a new retaining clip, thinking it would be better to be safe than sorry, and they are only a couple of bucks anyway. The entire deal was about $30 USD.
2) Lift and start disassembling your loved one. You may note the use of an emergency jack in my photos. I recommend a safer practice, but I also have a jack stand under the motor mount, only one wheel removed, parking brake on, front wheels chocked tight, and I was never under the car.
I removed most of the rear fender liner, leaving two or three fasteners at the very back. You simply need enough room to get your hand on the back side of the cable at the door end.
3) Remove the side vent (always a joy) and pop off the little drain flap housing thingy. These simply pop straight out, no unscrewing necessary.
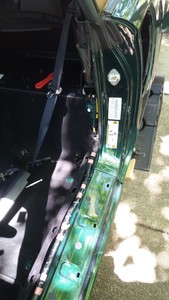
4) Remove the driver's seat. Don't forget to unplug the weight sensor. Remove the door scuff liner and the vertical molding. Remove the cubby door and the side panel inside the cubby. The Precious should look like this:
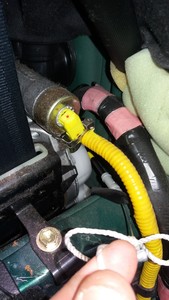
5) Locate the cable -- here I have my finger on top of it. You will see it go a few inches then immediately pop through the wall into the side vent area. This is about where you will begin to think the job is a piece of cake. Don't get cocky.
6) Now set to work on the front end of the cable. To remove the plastic cover around the lock, pull the front edge forward and lift the front edge, then wiggle out the back hook.
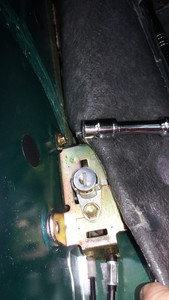
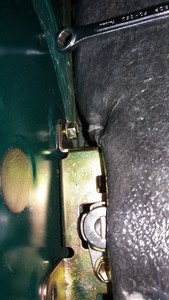
Push back the carpet; make some slack by pulling a bit out from under from the edge under the cubby if you need to. Completely remove the rear bolt holding the cable housing, and unscrew the front one about two turns. You do not need to remove this one, just back it out far enough that the gold box will tilt up vertically so you can see under there easily. You will need to look at the cable ends, how they attach, etc. This is pretty fiddly to get the cable off, and much worse putting the new one on. If you get frustrated, I suppose you could remove the housing entirely, but I found the front bolt rather difficult to unscrew so I kept it on. The photo shows a ratchet wrench, but I ended up using a box wrench, because it is just too cramped. Pay now, or pay later... LOL, in reality you will pay twice.
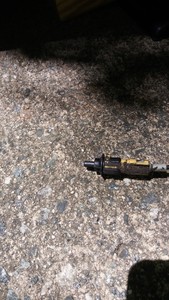
7) Remove the cable. First remove the jacket end from the retaining slot, then unhook the cable itself. It helps to bend it right at the point where it meets the cable end stud thingy, like this. You can do this with fingertips.
8) Now, remove the rubber seal around the body penetration. Just pinch it with your fingertips and it will pop out.
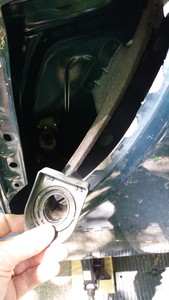
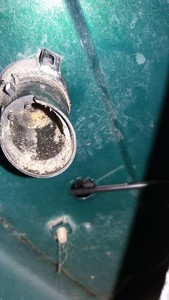
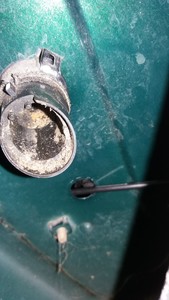
9) Remove the rear end of the cable. Pro-tip! Do not try to turn the retaining ring/clip. Mine did not budge, and a mess was starting to form. YMMV, and of course you can give it a try, but it was very easy to remove from the back. Just reach up there and turn the cable. The thumb tabs are much bigger, and even in the cramped compartment, it is fairly easy.
Important: Be sure to slice the sh*t out of at least one fingertip on the sharp metal quarter-panel stand-off. Fortunately, this is a simple task, as it has a nice sharp (and filthy) edge on it. Why cut yourself? If you have to ask...
I got my whole little finger tip segment, lengthwise, if the reader is wondering. Gotta pay the Frog Tax.
10) Remove the old cable. I played it safe and tied a bit of string to the end of the cable so that when I pulled it through, I had the path threaded. While the distance it travels inside the guts is short, this is an easy 30-second investment in making sure you don't have any fiddling around in the next couple of steps.
11) Carefully extract the cable. Do not yank or tug on this, as it may hang on some of the smaller electrical wiring in that intestinal area. See the image in step 5 -- note how the cable passes under that small wire. You don't want to tear anything up, do you?
Now, if your car pranks you like The Frog pranks me, you may find a nice surprise: my old cable's door pin had not actually broken off at all. But I was way too far in to turn back, and the old cable was a little sticky, so I trashed it. Just enough doubt was placed in my mind by the capricious The Frog, however. That little bugger...
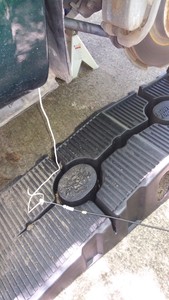
Here is the tied cable after carefully pulling it through. Untie the old one, but do NOT tie the new one yet. Reach into the side vent and pull the cable end on the right (now free of the old cable) and pull it out the side vent. Make sure the other end stays in the cabin. Now tie the string to the front end of the new cable.
12) CAREFULLY pull the cable back into the cabin. Here is another Pro-hack: again, when you insert the new one, start with it hanging out the side vent, NOT like this:
Like this:
The reason for this is that it is about 47.6 times easier to seat the new rubber grommet when the cable is more or less perpendicular to the panel, rather than flattened against it. Just be careful when you feed the cable back toward the rear when you are done, it is pretty tighe quarters right there.
The split-ring rubber seal is a little intimidating, but just get one edge in there correctly and carefully work your way around. If you do it right, it eagerly seats itself perfectly. This was one of the things that I was sure was going to invoke a bit of profanity, but it took all of 30 seconds.
13) Re-attach the front of the cable to the gold box and pop the cable end into the hook on the lever. This part did invoke some cussing. P. I. A. The only advice I have here is patience. You'll get it eventually.
14) Now it is time to attach the rear. This one is fiddly too, and comes right on the heels of fiddle-farty step 13. Taking note of the anatomy of the retaining clip and the cable end, note the little notch right up behind the wide ring on the clip. Once you insert the clip into the socket in the fuel door bay, you need to turn it so that little cutout on the clip tucks behind the housing. Play around with this a bit (using the old one) to get a feel for it, as well as the force needed to lock the clip onto the cable. Why use the old one? Because you are going to drop it at least once, silly! You should not even need to ask...
15) With the retaining ring near the left hand in a place you can easily get it, and cable end in the right hand, feed the cable end up to behind the hole and put the retaining ring over the end. It helps here if you have plenty of slack on the cable. Don't have it under the carpet just yet.
This is a good time to cut the sh*t out of your fingertips again if you missed the first opportunity or if you just want to do it again. I passed up the second opportunity.
You will have to man-handle the cable a bit to get it to line up, but DO NOT KINK IT. This is where I suspect the cable wears the most, since the bend is pretty severe once the cable is installed. This is where the slack would help. Once everything is lined up, give the clip that final little twist to secure it, then turn the cable end so it locks onto the retaining clip. If you are inclined, this is where you might be able to open your first beer. NOW you're in the home stretch...
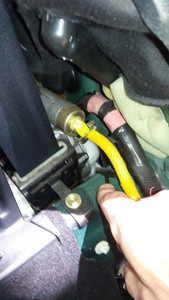
16) Gently get the cable tension adjusted so that it is even , giving as much slack to the rear as you can. Run the cables OVER the seat belt bolt (this might be wrong, it just didn't seem like enough room if they run under it, and they have a tendency to want to get under the bolt shoulder or the head and get pinched -- that's not good). Also remember to clip the fuel door cable into this little clip:
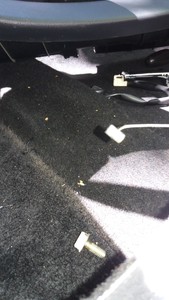
17) Replace carpet, trim, cubby door, etc. Double check your seatbelt bolt. Then, check the seatblet bolt. Reinstall the seats, being careful not to drop the posts into the wrong holes (the seat gets stuck, argh). DO forget to plug in the seat sensor, because you need more practice. RE-remove the seat, plug in the sensor, reinstall seat. Put the side vent on, replace the fender liner, rear wheel, and whatever else I may have missed. Don't forget to move your jack stands well away from the car before lowering it. I did remember that (it's just the seat sensor I have trouble with).
18) If you are feeling bold, adjust the tension in your gas door if it needs it. You can simply bend the spring/sheet. Do this slowly, a little bit at a time. If the leading edge of the door sits proud of the body panel after your first bend, you can hold the rear edge with one hand and push the front edge straight in until it bottoms out. It will bend it and push the front edge of the door back in. Be mindful of the gas door cable pin as you are doing all of this. Maybe this should be step 1...
I found that the tension on my door was very high, and may well have contributed to the early demise of my cable. Very high, meaning that while it was at rest and open, pushed as closed as it would sit naturally, it stuck out about 1.25 inches (about 3 cm for you advanced people), and was very stiff. Now that I have adjusted it, it pops open about 0.5 inches (12 mm) and puts just enough tension on the pin to keep it from rattling. Much better. Adjusting the door was easy, with some patience.
This job could be considered a PIA, and parts of it truly are, but I bet it would set you back at least one Benjamin to have someone else do it, if not two Benjamin. I took about 2 hours, but I am newb, I always do my seat installs twice, etc. A more competent, practiced person could probably do it in an hour.
🐸, 2003, Electric Green Mica
NottaMiata => "This job could be considered a PIA, and parts of it truly are, but I bet it would set you back at least one Benjamin to have someone else do it, if not two Benjamin. I took about 2 hours, but I am newb, I always do my seat installs twice, etc. A more competent, practiced person could probably do it in an hour."
But the more competent, practiced person would not treat your car with the love that you do! That, as you know, is a great reason for us less competent folks to do our own work!
Way to go NottaMiata !
2007 S2000 (New Formula Red)
2005 Spyders (Two in Paradise Blue Metallic, One Super White)
2004 Tundra SR5 Double Cab (White with 2UZ-FE Engine)
2003 Tundra SR5 Access Cab (Silver Stepside with 2UZ-FE Engine)
2003 Sequoia SR5 (Black with 2UZ-FE Engine)
1970 Olds 442 W30 (Nugget Gold )
Nice work and thanks for documenting it!
Yep, bookmarked this for whenever it happens to me.
http://zero3nine.com/files/dospwn.gif
Good info, too bad I don't have a fuel door cable...
😮
Mono Craft GT-300 with a few upgrades...
Awesome job doing the write-up. Thank you for all the extra time and effort you went to, to do that for us. This is what makes this community great! Thanks again.
