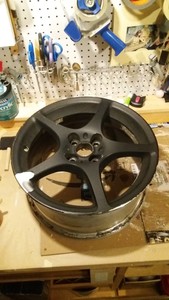
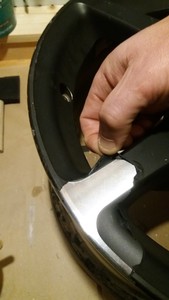
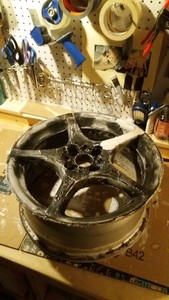
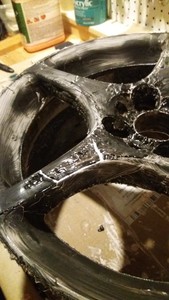
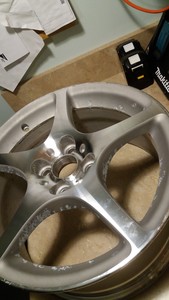
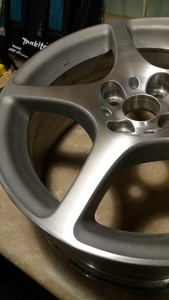
... and spending more than I would on steelies, while taking a week so far to do it.
But it hasn't really been all that dirty.
The goal was to have four 16" stock rims, and not invest too much in them, since they were going to be winter wheels on a DD. I started out with a pair of stock wheels from my own vehicle which had obvious signs of some bubbles and peeling paint, but they didn't look significant. Added to these were another pair of 16" rims from a set donated to me by the gracious @pwnzor. All I had to do was make a 5.5 hour drive to get them. Quite fair.
Thusly did the cash expenditures begin, but I am still well, well inside my $300 budget guideline, which is just a bit more than really cheap steelies and extra tire swaps would have set me back. Those steelies would be on another car, and I would have some vaguely beaten-up BBS wheels from there now available for The Frog. But who wants yucky old steelies on ANY car? Still, I already doubt the wisdom of taking this road, but now I am committed, and I really think I am closing in on the finish. If so, I will call this a success, because I will have stock-ish wheels, which I happen to like. Press forward!
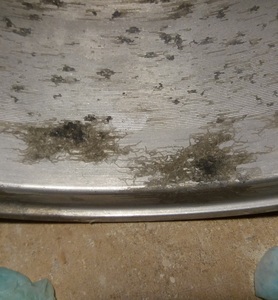
Upon my return from the wheel pick-up, I started out with two of those wheels which had all been painted in Plasti-Dip or some similar coating. From the outside, they looked to be in good shape, very little curb rash compared to mine, which have some tragic rash. They looked like this:
Peeling them was too tedious, especially in the barrels. Let's see if that old citrus paint stripper I have will do anything...
Indeed it did, and rather quickly:
🐸, 2003, Electric Green Mica
I did much of the stripping about 45 minutes at a time in the mornings before work over the course of the next week. Pretty low-stress, not a bad way to spend coffee time.
After the first treatment on each, the first two wheels were stripped down to just the factory paint. In hindsight, I think the clear-coat came off with the sticky black plasti-dip now-goo. Taken slowly, it wasn't messy to get the goo off, just a bit tedious. With the correct attitude, it became a Zen experience. Or some naive Westerner's adaptation of Zen.
Time to strip the factory silver paint:
🐸, 2003, Electric Green Mica
Factory paint was more flaky, and given enough time and a bit of attention to dry spots, it was coaxed off the first two wheels in short order, with much less mess.
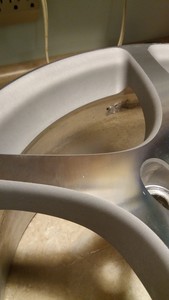
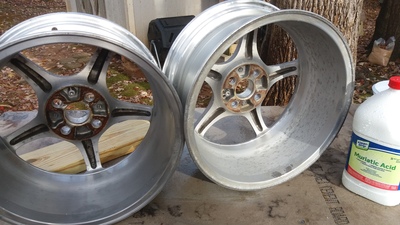
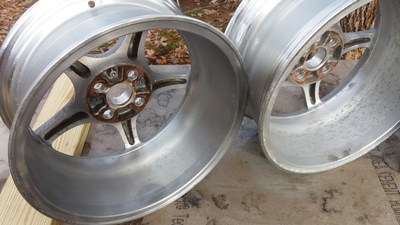
I started with the plasti- wheels first, and they came out rather well. The wheels were in very good shape. I also started to really dig the dull gray in the voids. I'm wanting to add gray to The Frog's accents, and will replace my tan top with gray, so the look of these grew on me very quickly. Other people might think it is terrible, but I don't care. Besides, the goal is quick, dirty, remember?
Sivart-esque or not, I like the industrial gray look of the unpainted voids.
There were a couple of stickers from balancing weights and a couple of re-dos on the paint, but they didn't take long to sort out.
So after the first two wheels, I had been very optimistic. By this time, I had decided to purchase a product called Sharkhide, which purports to be a sealer of some sort that prevents oxidation. It is apparently popular in marine applications. So off to the forums I went, and sure enough, the pontoon boat guys swear by it. It's a wipe-on application, dries in two minutes. Seems easy enough, but the stuff is a bit pricey. Buy once, cry once. Hope I get what I paid for.
🐸, 2003, Electric Green Mica
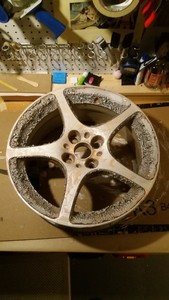
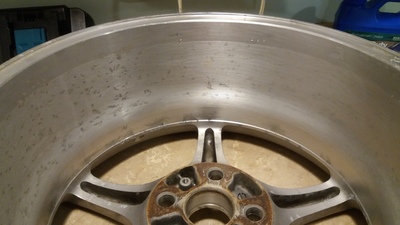
Now, time to do The Frog's original wheels. Let's see what's under that paint...
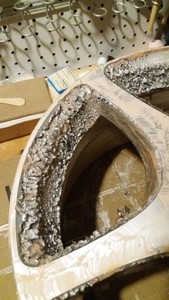
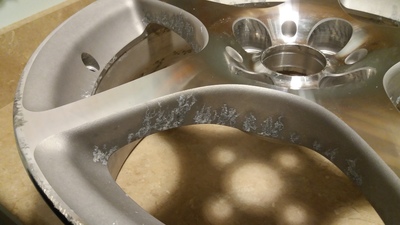
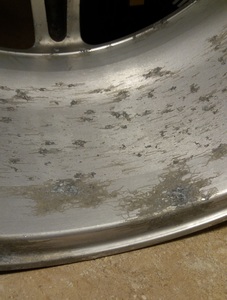
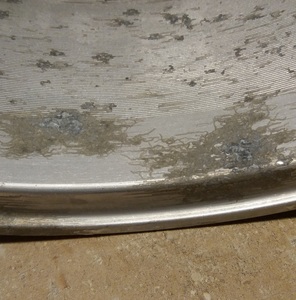
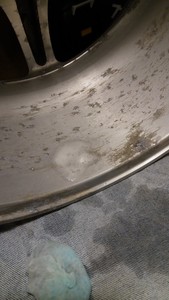
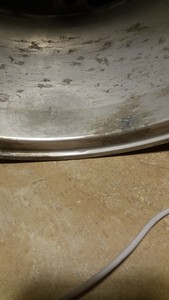
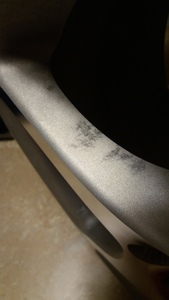
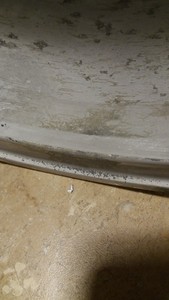
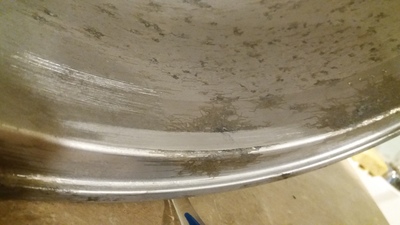
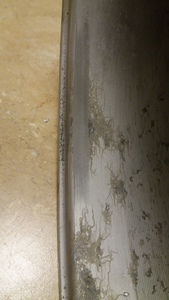
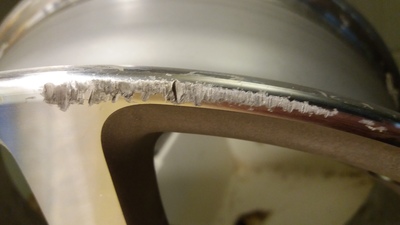
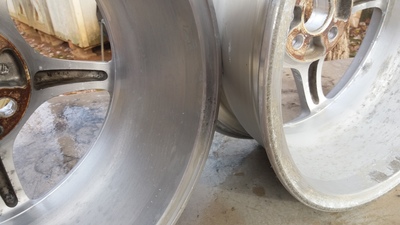
Oh, my! It didn't look this bad on the outside.
Dig that curb-rash on the left. These wheels have seen better days. This is why the initial bar for the project was set low from the outset.
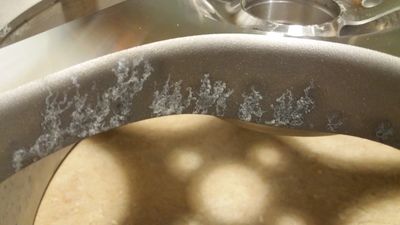
This is as close as my camera would get. It gets confused with all the surfaces, I guess. Maybe it can't find the face, LOL.
It's not as bad in person as the camera makes it look. It's just etched, maybe a human hair in depth at the worst couple of spots.
I've decided to embrace the fungal-looking damage, and try to just remove the corrosion by chemical means, get down to the metal and apply the Sharkhide. I am really not interested in another 80 hours of sanding from 120 thru 600, and polishing through another ten grades, because I was actually really liking the dull gray textured look from the casting and the uniform surface I saw in the first two wheels. I don't want to sand that off, neither for cosmetic reasons, nor for the Herculean effort reasons. I'm just going to press forward. You don't win battles without taking some losses. Press forward!
🐸, 2003, Electric Green Mica
Great write-up thus far. Thanks for taking the time to photo-document and write descriptions. Any chance of a product shot of the Sharkhide and paint stripper used?
Yes. Very interesting so far. Hmm Sharkhide. I have to look that one up.
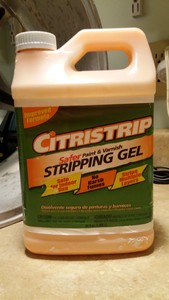
I will post shots of the products. The stripper was a half gallon of CitruStrip, bought at a Big Box hardware probably a decade ago, maybe cost me ten bucks at most, and already got my value out of it with past home remodeling jobs.
It worked just fine on these wheels. It removes stickers (I hate evil stickers SO MUCH), leaves human skin 99% intact but a bit dry, is a water-cleanup product which is always VERY nice, has mild fumes suitable for indoor use unless you are very sensitive. It does not remove or even soften road tar, however. I forgive them, that's not the product's intended application. I used about 1.5 quarts of the stuff over six applications - one for each wheel, plus two more for the initial plasti-dip removal on the nice wheels.
I stripped all the way around to the steel belt channels on the outside of the barrels, got some of that tire sealant muck off, but I did not strip the middle section of the barrel (the surface inside the tire). I don't care if the old clearcoat remains there, but I will hit 100% of the surface of each wheel, inside and out, with the Sharkhide when the time comes. Since Sharkhide is solvent-borne, I will save the barrels for last, in an isolated step, in case the SH softens the clearcoat that I ignored and makes a fun mess. I won't care about that if I have isolated inside the tire.
🐸, 2003, Electric Green Mica
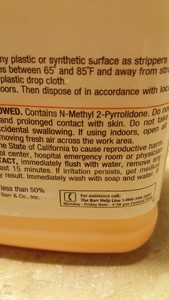
Here is the stripper I used. I guess some of that N-Methyl 2-Ply got dispersed all throughout my home airspace, but I did have a window cracked. {shrug} Note to self for next time, SH is already slated for application outside, if I ever get that far.
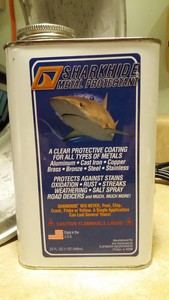
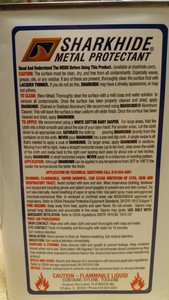
And here is the Sharkhide:
🐸, 2003, Electric Green Mica
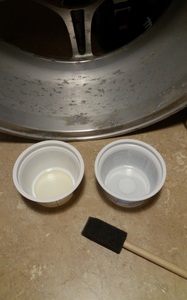
Now on to the Acid Tests. Yes, literal acid. Nothing scary (or existentially enlightening), starting with some household acids: acetic and citric acids.
Before (dry):
Gather up some stuff -- undiluted Lemon juice on the Left, and undiluted white vinegar (5% acid) on the right.
Lay on some blotters to keep the acids in full wet contact. I re-wetted these whenever I checked in on the progress, but there wasn't much evaporation.
🐸, 2003, Electric Green Mica
Results of the acid tests after 1 hour (wet):
Four hours (wet):
12 hours, wet and dry, respectively:
That is the conclusion of the acid tests for Acetic and Citric acids, at food concentration, anyway.
Result-- side-by-side the 0 and 12 hours:
Yeah... we're gonna need some more horsepower AND torque (just so there's no argument).
🐸, 2003, Electric Green Mica
I know I have a stronger acid back there.
I pause here for a moment to say that I still hesitate to try bleach; I remember bad things about bleach and aluminum, stainless, or pretty much any common metal from my homebrewing/brewery building days [good times..]. I knew better than to use it, so there is no horror story, just good memories of outstanding beer, and a fair amount of physical effort. Worth it if you can do it; the beer is truly superb. So still no bleach experiment.
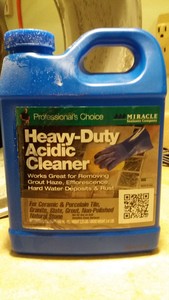
Yes, let's try that acid I use to strip the sealer off the grout in my shower floor. Again, I already had it in mind.
<Shuffles around in one of the two informal solvents and acids section of the semi-messy back room where all that shtt lives>
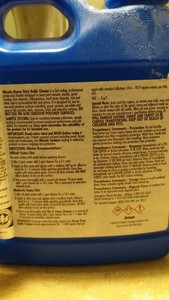
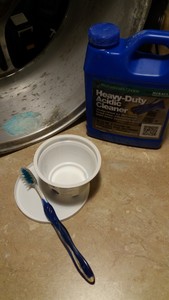
Here we go. A bit on the pricey side, and I don't have enough. I can get the same acid cheaper in larger sizes, I am sure, but I cannot seem to find the active ingredient on the label.
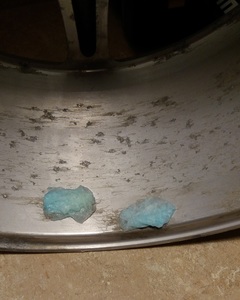
So, with a toothbrush I am now calling "Torque", I will add more horsepower, in the blue jug, and Torque there in the lower left. Torque is a hard toothbrush that was purchased accidentally years ago. Never had the inkling to brush my gums off in bloody swipes with that guy, but he has done a bang-up job stripping aluminum wheels.
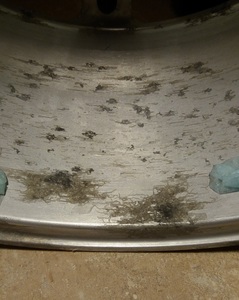
Here is a picture at the ten-minute mark. I didn't time these precisely, by the way, but the intervals were about ten to twelve minutes. I removed the blotter, Torqued the spot again, replaced blotter and re-wet. The acid doesn't fizz up on its own, but it foams up when Torque is applied with spiwit:
I agitated again, re-wet at 20 minutes. At that point, it was pretty obvious that this acid was working. Shrug, these are trash already, so Press Forward!
After another ten minutes, a total of 30 minutes or so under the acid, I stopped the process, rinsed with water. Maybe a baking soda poultice would be more effective to neutralize acid, but this is a small spot and water will work.
The additional horsepower and Torque definitely make an impact, but I am not set on this particular Horsepower. I just know something will do what I need it to. There is Sharkhide Aluminum Cleaner (this is not a shill thread, I swear. I haven't even used the protectant yet), which sounds like a mad stripper, ahem, for the type of corrosion I am up against. LOL, another $50... I'd still be ahead, but the difference is hardly worth it. Saving $50 to $100 was never the real goal anyway. I wanted to make use of the OE wheels that were just taking up space in my shop.
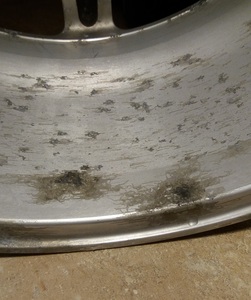
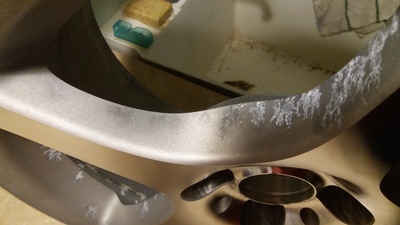
Anyway, the result is etched in a cloud pattern, which is disconcerting -- but then again that might make it look like Damascus steel, which would be epic. Or that look could still be just effing terrible, because dude, it's not a blade, it's a wheel. Besides, I have two that are clear. I don't want to intentionally etch those (do I?). I am already figuring that the good and bad wheels will stay on the same side of the car together.
🐸, 2003, Electric Green Mica
Right, so you aren't supposed to use ferrous materials to clean aluminum. The theory goes that particles of the ferrous metal can dislodge and get stuck in the pores of the aluminum, causing rust to form later. But I had to know, so I did a small spot. I am becoming emboldened - I did a spoke this time. Initial results were actually passable, since I am ready to be done with this "quick" project:
But, in a different light, this will not do. This is the same little spot. In sunlight, I'm sure this would look pretty bad, even for the "dirty" part of the spec (actually, it meets the dirty requirement perfectly, but that one was not really supposed to be taken literally):
Ok, so I guess I have to face the fact that I may be using sandpaper. Maybe... I am beginning to mull the idea of painting the sides of the spokes, and perhaps the barrels. This would more than likely seriously reduce the effort involved in removing all that staining. OTOH, if I sand and polish the spoke sides (the milled faces are staying un-modified, even if it kills me), it would look really nice, but it's a bit more work. First of all, I'd have to sand all four wheels, but even so, the entire area is manageable. And the actual profile is easy, even in the little corners, my thumb fits perfectly. But, the amount of material that needs removal is not inconsequential. If I sand, though, I am not going for polished, I want some contrast with the faces, so I would only go to about 400-grit, being sure to have all the scratches going in concentric circles (not swirls or cross-hatch). I still like the dull look in that area.
As I write, the sanding path feels less and less appealing. My wrist and elbow are permanently damaged from all that sanding back in college; I know very well that the pain will return quickly; my wrist is already bothered from the repetitive scrubbing, brushing and scraping I've done so far. It's been bothering me at work this week, when I type, which is something I do a lot. Waaah. Power tools are too risky, in terms of accidentally hitting the faces. This just seems like it's going to be a lot of work. I have no doubt it would look pretty good, but I am planning to leave some blemishes, so if the low spots look TOO good, then that's also problematic.
Before I finally decide that (I'm about 70/30 leaning toward paint vs. polish), I am going to go get a brass wire wheel and give the barrels some tough love. If I do decide to paint, I still want to get as much of the corrosion off as I can, so it doesn't just return. Acid is the ticket, but not 100%. I don't want it to get on the faces, though.
Further pondering how to proceed, I also wonder if the Sharkh Hide will:
A) accept paint later, if I were to seal it all now and decide to do paint later,
B) still be able to penetrate and seal that tenacious black half-stain/half-corrosion crap that remains even in the tiny pits after sanding. I will be getting as much of it off as possible, I don't plan for miracles, but even after sanding, there are pinholes of that stuff remaining, like, these:
If I have small black pockets that are perfectly sealed by Shark Hide and paint, will there be any oxygen contacting the Al and causing further corrosion? In other words, will a thorough scrubbing with stainless wool, a layer of SH, and paint -- if they do seal the spot off from all oxygen -- keep corrosion from resuming?
Also, here's the worst curb rash I have. The other four spots elsewhere are only about half as severe as this beauty. I have decided I am going to sand those a little bit and polish them up, but by no means will I get all the way down to 100% removal, because da-umn...
And I am not screwing around with filling these with bondo, either. A test spot showed them improved, even if the milling on that outer 3/16" is gone. I'll bring that back up to 600 grit, maybe hit it with some metal polish, and call it good. It would be my luck that I'd do all that work, hit black ice before Christmas and curb them again. If I leave them ugly, I'll never hit a curb again, so that's the best plan.
Paint is looking better and better. I really hope that I can SH the whole thing first, however. SH is a lacquer, I think, but my evidence is thin. Need to get that research done. At this point I am already at 80% likely to choose to paint.
🐸, 2003, Electric Green Mica
It's getting old. Two steps forward, one step back. I did some reading and say that hydrochloric acid, AKA muriatic acid, is often used to clean aluminum. With care. But before I committed to buying a gallon of nastiness, I wanted to be sure. I got a bit more bold, decided to do a large patch with the acid grout cleaner, but watch it a bit more closely. Torque was ready to assist:
So I went out to buy some muriatic acid. It's ten bucks a gallon, so sure, why not? I was able to find a larger stainless steel scrub brush, as well as a smaller one about the size of Torque. Torque remained ready to assist nevertheless. Also made a special trip to the grocery and picked up some stainless scrubbie pads. Waste of time, those things make terrible scratches, and despite extreme caution on my part, I STILL ended up scratching the shtt out of one of the wheels. That would be one of the steps back that I would not discover until later.
Being a sunny day with some breeze, it was a good day for this sort of fume work. Grabbed my full face shield, some gloves and old clothes, brought over the hose and set to it. About an hour into it, one wheel was done. Here's the side by sides:
Along with getting all the corrosion off the spoke sides, I consider the new condition of the barrels two steps forward, since the acid does a lot of the work the effort was fairly minimal, and it was only slightly too cold out but nice nevertheless. The results were promising, until I took a closer look later on. I only used the stainless scrubby pads in about three square inches before I realized they were scratching the textured surface on the side of the spokes, so I quit using them. I did notice one spot where I had bumped the face and boogered that up (sigh), but was able to shrug off "just one spot" at that time.
I don't have pictures, but suffice it to say that I was disappointed later when doing a closer inspection. The wheel that "only had one spot" actually has several scratches all over it. Just a few, and all very shallow, but across the grain and ugly. Sigh. The other wheel face is just hazy. I think I didn't rinse that one frequently enough and it might be etched.
LOL, I want to say two steps forward and one back. The barrels are satisfactory, and I got the spoke-sides clean enough to paint. Stains remain, and there is some pitting, but I think paint will fill those well enough. But I screwed up the faces on both wheels. Polishing is now in order, and I think it will be enough to remove the fine scratches and haze. One step back. There aren't that many steps left, though. I *have* to be getting closer.
🐸, 2003, Electric Green Mica
Whew! I didn't forget, I've just been sanding.
I knew what Dev meant when he used the word eyesore. I wasn't going to do that. Nope, I sanded these things properly. 100% by hand. Power tools and soft materials don't mix, this I know from woodworking.
So I sanded them by hand.
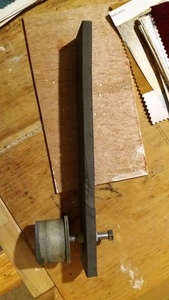
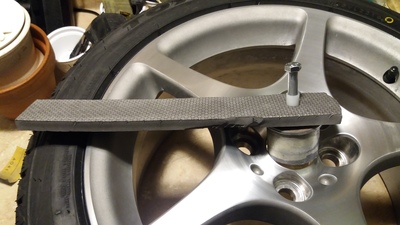
I made this little jig, patent pending (its a secret, please don't tell anyone, I am only sharing this with you guys...) to guide my wide strips of Wetordry (still one word, BTW) in wet mode around the center. Low-tech, insanely effective:
This gives you the idea of how to use it. I also have a short blade, and a few other pads and such made from the same cheapo rubber floor foam mat stuff. Imagine that there is no tire, I took this photo at the end of the ordeal, er "journey", but this jig was made and put into use before US Thanksgiving.
Yes, the Great Sanding Adventure started sometime before Thanksgiving, and the wheels are going on The Frog tomorrow, Christmas Eve. I'll get you caught up:
Oh. My. God.
With. The. Sanding...
Three weeks later, from 180, to 320, to 600-to-1000... TIMES FOUR...
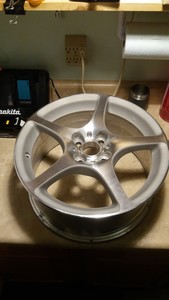
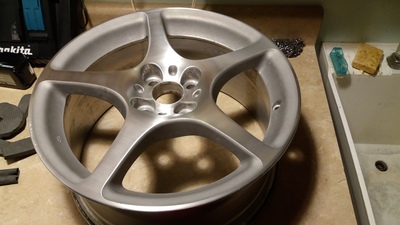
After many hours of sanding I had four of these, give or take some individual personalities:
The fine aluminum dust stains your workspace and your hands. Look how nasty that thumbnail is! (it's just been scrubbed with soap and a brush):
(That's our rescue dog, "Poppy!", gettin' all pirate-y with the neck scratches. Best dog ever.)
I rushed through the job a little bit, and the sanding is uneven -- I could have spent more time in the mid-grades -- I rushed through since it has been cold for many days now. The s.drives, while the handling is still crisp, are becoming like riding on blocks of wood. I think I have chipped a tooth already. So after three weeks of sanding, and the stress that it placed on my wrists and back, I took a week or so off. Time is still ticking by, though... looks like the black paint on the spoke-sides is not going to happen right now. So the Plan has changed to just getting the damn things sealed and on the road. I'm simply out of time. Sharkhide supposedly comes off with lacquer thinner, I can work with that later.
Will see about that in the spring when these wheels come back off the car, but now I will have to make the best of it and see how the Sharkhide does, and looks. What was it I was saying? Oh yeah... Press Forward!
🐸, 2003, Electric Green Mica
The dog tax has been paid. All is well.
2000 Toyota MR2 Spyder, 2021 Lexus UX 250h F Sport
