I love this place and the knowledge here. Based on the information Dev provided, I went back to my local automotive paint store and learned a bunch more. Dev is absolutely correct about the thicker the paint, the more likely it is to crack or fail in some way. Although the mud flaps on my Corolla still look great, but as the mud flaps age and the paint sprayed onto them age, both will shrink and eventually -- because of the thick material I sprayed on them -- there is greater likelihood that the paint will fail. I'll just have to wait and see how long it lasts. Unlike my spyder, my Corolla is a disposable car and I am not married to it. For all know, it might end-up that I sell it before the paint ever fails. I'll just have to wait it out and see what happens.
While at the store, I talked with my friends there about this project (which they thought was pretty cool) and the materials I am using and they have a special automotive paint specific for plastic -- and HDPE is plastic -- that will allow me to skip having to use an adhesion promoter because it actually melts into the plastic. That will make it possible to keep the purchase price down because of fewer steps to create the end product. Yea!
So this weekend, I will work on making adjustments to the size of the TBLV and if there is time left over, I will work on creating a mold to press the pre-cut pieces into to form the final shape with consistent beveling of the edges. My goal is to make the mold so that once I press the HDPE into the mold that it is only a matter of carefully trimming the pieces, wash, finish sand, wash and prime. I guess I am about to find out if I have the skills to create the mold and use the positive power of OCD to make as perfect a product as possible. There are lot of variables to hurdle. I will use the same material to make this negative mold as I used to make the positive mold when I was making the frunk lights years ago. My hope is to be able to use the same process without having to use a mold release (negative molds are different from positive molds, dah). Time will tell. I will keep y'all posted here as the project progresses. Keep your fingers crossed. To be continued . . .
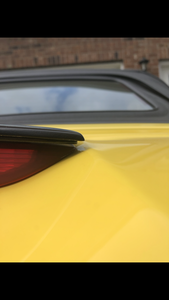
SINCE you’re talking molds, I think a little concave curvature would be nice. It would help hide the gap left by tape thickness. Also A flat surface looks a little out of place on the car body, nature loves gentle curves.
I make Amateur Armrests - see the Commercial Forum. I also have SMT repair seals available.
Thanks for the picture that clearly shows the need for some additional design modifications. I'm not sure about my ability to make that curve, but I am thinking of ways to recess some areas that will help to hide the tape.
The tape gap is really not noticeable, especially if the profile were very slightly larger around the perimeter. The only way to see the gap is from that one angle (lid open, or crouching down behind the car.). Plus my tape placement contributed!
I make Amateur Armrests - see the Commercial Forum. I also have SMT repair seals available.
A small front lip, maybe 1/16 of an inch downward from the back edge (facing the back of the car that is) might fix that, if that's at all possible. But that definitely complicates the manufacturing.
2000 Toyota MR2 Spyder, 2021 Lexus UX 250h F Sport
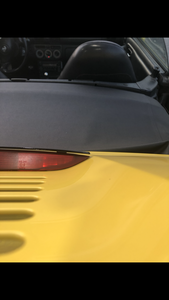
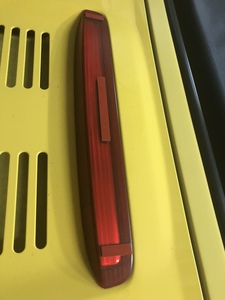
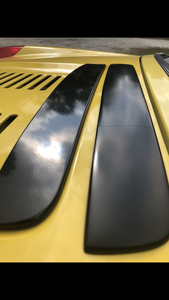
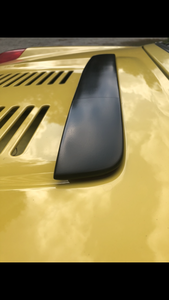
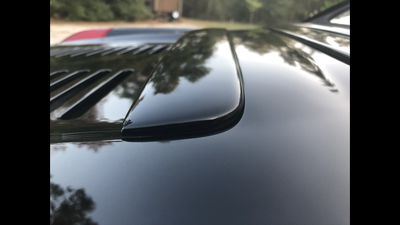
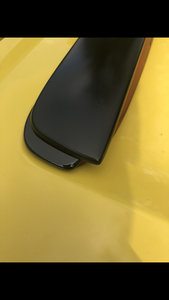
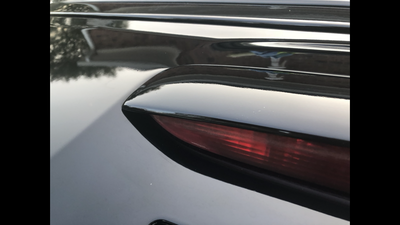
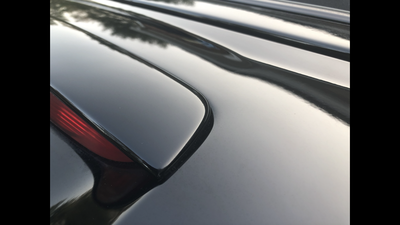
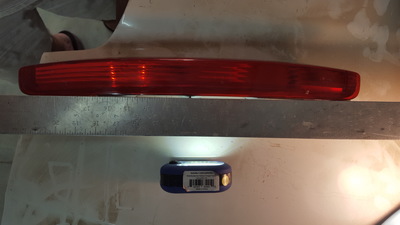
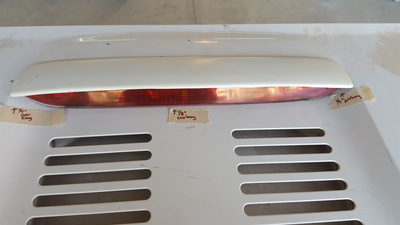
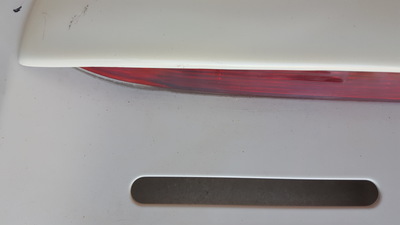
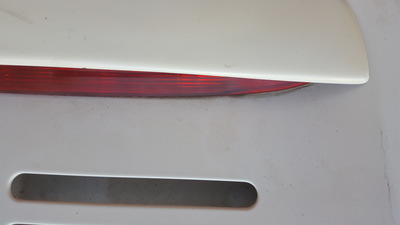
To continue the discussion, I found my old cover from Malaysia(?). Apparently the one on my black car is the duplicate I molded off this original. I had the duplicate professionally painted. The original is slightly larger than your prototype (see pics) with a little more overhang at the rear. Also concave. I’d be happy to send it to you for mock-up if you’d like. Black car pics are all from my duplicate/professionally painted cover.
And yes there’s a big crack across the original cover, seems to be structurally sound so it’s probably that thick paint problem you guys described.
I make Amateur Armrests - see the Commercial Forum. I also have SMT repair seals available.
I was able to get out into the shop today and play with the TBLV again. I am grateful that I have a spare engine lid and spare TBL that I could work with in the shop rather than working on my car's engine lid. Hoarding parts comes in handy -- at least that is what I keep telling my wife.
I learned some things:
The back edge of the Third Break Light is not straight
I checked the fiberglass TBLV that I have and it also does not have a straight line on the back -- it has a curve to match the third brake light.
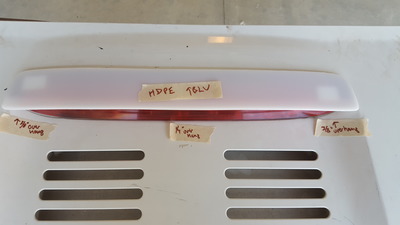
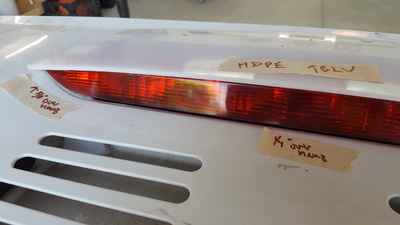
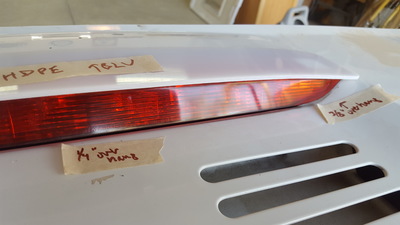
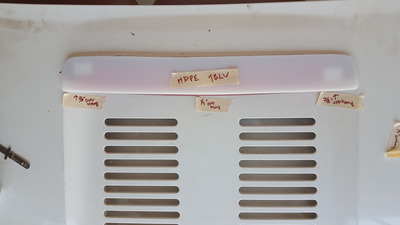
I traced the Fiberglass TBLV and used it's exact shape to make this version of the TBLV. I'm using white HDPE this time around as it was what I had laying around. Note that the HDPE in the pictures below has no paint on it, whatsoever.
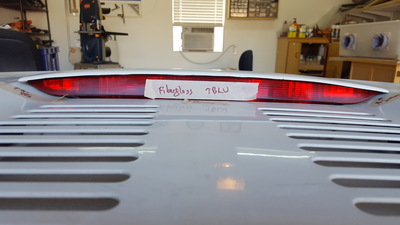
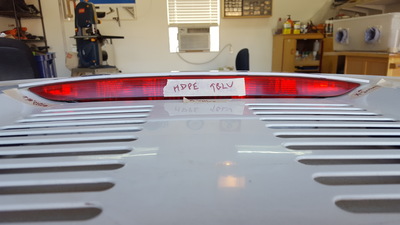
Here are comparison pictures showing the Fiberglass TBLV and the HDPE TBLV
Fiberglass/HDPE
Fiberglass Overhang measurements. Note that the overhang on the left and right sides is more than in the middle. I think the original creator was working at getting a straighter line across the front of the TBLV for esthetics. The First version of my TBLV followed the radius of the TBL. My second version will follow the approach of the original fiberglass TBLV with deeper overhang at the sides than at the center.
HDPE Overhang Measurements
HDPE Overhead View. I forgot to take a Fiberglass Overhead View
So . . . there are some pictures to take a look at and give feedback. I worked on creating a mold this afternoon to see if I can heat stamp the HDPE blanks into having consistent curved edges, but the first mold was a no-go. I will make a second attempt tomorrow, but at the moment I am questioning if that is going to work.
To be continued . . .
Great fun. I love seeing a project come together!
I make Amateur Armrests - see the Commercial Forum. I also have SMT repair seals available.
Very cool! I gotta say, I do prefer the old version in the sense that it follows the curve of the light rather than being straight, but either way is good. I just love the curved look myself.
2000 Toyota MR2 Spyder, 2021 Lexus UX 250h F Sport
Very cool! I gotta say, I do prefer the old version in the sense that it follows the curve of the light rather than being straight, but either way is good. I just love the curved look myself.
If you sacrificed UM TBLV V1.0 for testing and you want another V1.0, just let me know and I'll make one for you for all your time and trouble to test these b ad boys for us. Just let me know.
R & D report for Sunday, October 6, 2019
I pulled a total of three molds this weekend. The first two did not come out so well but were the training ground for me to learn and make the 3rd mold which came out quite nicely. These will need to cure this week and due to time constraints, probably the next two weeks. I will then use the first two molds to practice making the consistent curved edges that cyclehead had encouraged and hope that I am a quick learner so when I attempt them on mold #3 that they turn out nice. Then I'll start work on the top piece of the mold that will press the malleable HDPE into the mold that I started making this weekend. My hope is -- and time will tell if I can pull this off -- is that not only can I make the uniform edges, but that I can imprint a channel into the back side of the UN TBLV that will host the 3M double stick mounting tape so that the UM TBLV sits closer to the TBL and gets rid of the gap that we saw in cyclehead's photos. Keep your fingers crossed.
To be continued . . .
Very cool! I gotta say, I do prefer the old version in the sense that it follows the curve of the light rather than being straight, but either way is good. I just love the curved look myself.
If you sacrificed UM TBLV V1.0 for testing and you want another V1.0, just let me know and I'll make one for you for all your time and trouble to test these b ad boys for us. Just let me know.
I haven't destroyed it so far! Waiting and reading the thread to see what kind of testing is necessary. Although HDPE sounds like the ideal material. Autocross on 11-23 so that will be a high heat event. Lots of racing and idling.
2000 Toyota MR2 Spyder, 2021 Lexus UX 250h F Sport
I have one of the original from the Philippines. I waited forever (3 months) to get it, and only installed after another car scraped me and got it painted as part of a deal. Once it was on I completely forgot about it. That's the point.
It looks the best when my car is lined up with other Spyders that don't have it. It makes the most difference with with the faster chroma (white, yellow, red).
The option that adds the least amount of curvature and most amount of coverage looks the best.
scottsmods.com
Yep. You want the line in back of the visor to not follow any curvature, (not to be Confused with following the curvature on the top which should bend to form an arc) it should be straight and just cover the brake light entirely. Don't over think it.
Also scotched is right. In order to pull off the brake light visor it needs to be invisible which is what enhances the car as a whole. I had someone long ago asked me if I could paint it in chrome, go figure, the poor boy thought it was a stand out appearance modification.
When the brake light mod is in effect it removes the visibility of the brake light from the top and sides, which without it breaks up the uniformity. The visor can actually enhance the entire rear of the car so it looks longer and less cheaply made.
I decided to put my efforts into testing primer adhesion since that is a concern. If the flex primer I use works then it would the way to go forward and if not then we need to have a better solution.
